Simply put, site maps are a list of the pages on your site. There are two kinds of site maps(a) those that humans can use to navigate a siteand(b) encoded site maps for the use of web bots and crawlersExamples:
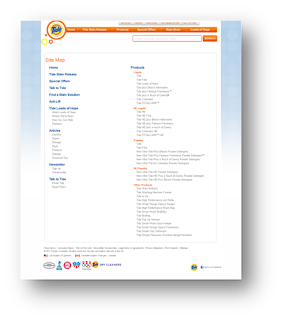
Sitemap page on a website
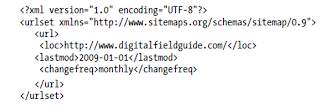
XML sitemap containing one URL
Why should you create a sitemap?
Google encourages webmasters to create the second kind of site map, which is written in XML. If you have this kind of site map registered with Google, your site will likely be more fully and quickly indexed, and changes to your site will be noticed more frequently Once you submit your site to Google you don’t have to wait for Google Bots (Google’s web crawling spiders) to come but rather invite the spiders to visit your site
What are the benefits of a sitemap?
Sites with certain characteristics will benefit from site mapping. Here are the kinds of sites that will benefit the most from mapping (although there is no downside, so site mapping is something all sites should do) :
• Sites with dynamic content
• Sites that have pages that the Googlebot can’t easily crawl and process—for example, pages featuring AJAX or Flash
• New sites with few inbound links (the Googlebot crawls the Web by following links from one page to another, so it may be hard for Google to discover your site if it isn’t well linked)
• Sites with a large archive of content pages that are not well linked to each other or are not linked at all
How to create a sitemap?
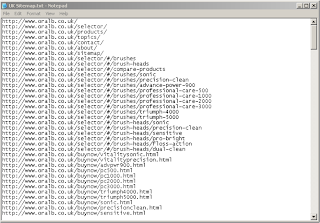
Step 1 - You need a most updated list of every single existing URL from your development agency. Get all the URLs of your site on a txt notepad

Step 3 - Convert URL list txt file into Google Sitemap format (.gz)
a) Run Site Map Builder .NET
b) Go to file - Click on Load Map
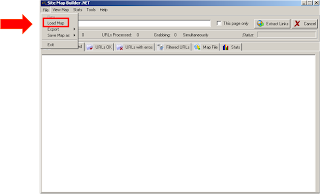
Step 4 - Change File of type to *.txt
Step 5 - Choose location where you have saved your txt file and then click Open
Step 6 - Once you click open the txt file will load in the tool and will look like this
Step 7 - Select Data options for all links
Step 8 - Set Priority to 0.7
Set Change Frequency to Weekly
Note: Keep last modified date as checked
Step 9 - Click Apply - your changes will be applied to all URLs
Step 10 - Go to File - Save Map as - Click on Google Sitemap Gzip file
Note - You can also create an XML sitemap. Both formats work perfectly fine with search engines!
Step 11 - Specify Google Sitemap file name. Always include the word sitemap in the name
And you are done!
Things to Remember!
The sitemap is always uploaded to the root directory of your website server /public_html/ where you have your index.html or index.htm or index.php file
The location of where the files are uploaded is extremely important for Google Webmaster Tool


No comments:
Post a Comment